GL'S Hot-GLASS Link Exchange
---------------------------------------------------
April/May, 2007 - Vol. 20, No. 6.
(This issue will be available online after the printed copes are sold.) If you want your subscription to start with this issue, please tell us to start with (v20 n6)
<Click Here> To start your subscription.
Partial lineup for the coming issue:- Article in progress - Please check later for update on this article. ...
- --------- -
- --------- -
- Article in progress - JDC Roman. ...
- Article in progress - Sabina Boehm. ...
- Article in progress - Laura Rasmussen. ...
- Article in progress - Bruce Suba. ...
- Article in progress - Chadd Lacy. ...
- Article in progress - Fred Rossi. ...
- Article in progress - Vic Nadurak. ...
- Glassified Ads - April/May, 2007 - Vol. 20 No. 6.
- Workshop Calendar
(This issue will be available online after the printed copes are sold.) If you want your subscription to start with this issue, please tell us to start with (v20 n5)
<Click Here> To start your subscription.
In This Issue
- Making a Glass Orchid - by Margaret Neher � My first attempt at an orchid was unplanned. I was visiting Robert Mickelsen�s studio in Florida with a couple of friends after the Tampa GAS conference. One of the guys in his studio heard that I was interested in orchids and brought me a blossom from the greenhouse where his dad worked. I took a deep breath, grabbed some glass and went at it. The result was a bit wobbly and extremely fragile, but I was on my way. The rest, as they say, is history�and about eight years of practice...
- Creating a Hollow Sandblasted Head - by Jacob Lee � One of my new interests has become blown sculpture, so I thought I would share some of what I have learned. Most of the techniques I use have been done before and sometimes with better results. I am just trying to expand my personal relationship with glass. Instead of trying to show the details of every step, I want to show the process of creating a complex sculpture...
- Implosion Millifiori - by Cuatro Kruse � Hello fellow glass enthusiasts! Today I would like to share with you an awesome technique that I learned from Jason Lee about two years ago when he was working in Burlington, Vermont. Since learning how to make implosion millifiori cane, I have stumbled across many new design and pattern possibilities that I thought to be impossible before...
- Let�s Talk About Pricing - by Milon Townsend � Pricing your artwork is often the most uncomfortable experience in the process of creation. It requires an entirely different head, a radically different assessment of the standards of �successful� work, far removed from questions of aesthetic, technical or internal accomplishment exhibited in the work.
I think that it is fair to say that each of us struggles mightily to arrive at the right price, hemmed in by the opposing fears or pricing it so high that it won�t sell, or so low that we won�t make any money, or might even lose money. There is, after all, an implacable relationship between time and money.
Many factors contribute to being able to successfully determine the right price, one...- Jellyfish Tutorial - by J.D. Anderson � I will forever be grateful to Trilli for the great wealth of information that he so willingly shared with me. He helped create a confidence in myself that has allowed me to move forward with skill and not just enthusiasm. I know my journey has only just begun and I have a lifetime of learning to do. I look forward to each new experience and only hope that one day I can help someone the way that he has helped me.
I would like to share with you a tutorial for a jellyfish marble that stemmed from a pushing technique that Trilli taught me. I hope that it will inspire and help someone out there the way that other great tutorials have inspired and helped me....- Candlestick Basics: A Step by Step - by Julie A. Reynolds � In this step by step, lampworker Douglas J. Remschneider demonstrates how to make a simple candlestick. This design can be modified as additional skills are acquired. The basic steps for the candlestick can also be applied to a production setting. All of these techniques require a great deal of practice to master. Many of the steps described will become second nature when performed often. Remschneider states that the candlestick is the perfect product because it allows you to create something that hones your skills and is a highly saleable item. So, let�s go play with fire! ...
- Electroforming on Glass: Electroformed Ancient Vessel - by Janelle Zorko � In this series of articles, I will demonstrate several ways to add texture and interest to your glass work. These techniques will involve the use of items commonly available at any jewelry supply or crafts store. While I work on a small scale, these same techniques can be used with a larger electroforming bath and with blown or cast items....
- Borosilicate Color Developments: The Role of R & D - Henry Grimmett � The other day I was talking with Patti Frantz concerning an article she was researching on the history of borosilicate beadmaking. We were discussing the growth in numbers of beadmakers using borosilicate over the last few years when she recalled the need to hand mix all her colors 20 years ago. She remarked that the number of colors, just 10 years ago, could be counted on one hand. (In reality, there were about 30 colors by name but only about five colors were useful). Today, there are close to 120 colors (200 by name) that beg the question; how did this change take place in such a short period of time?...
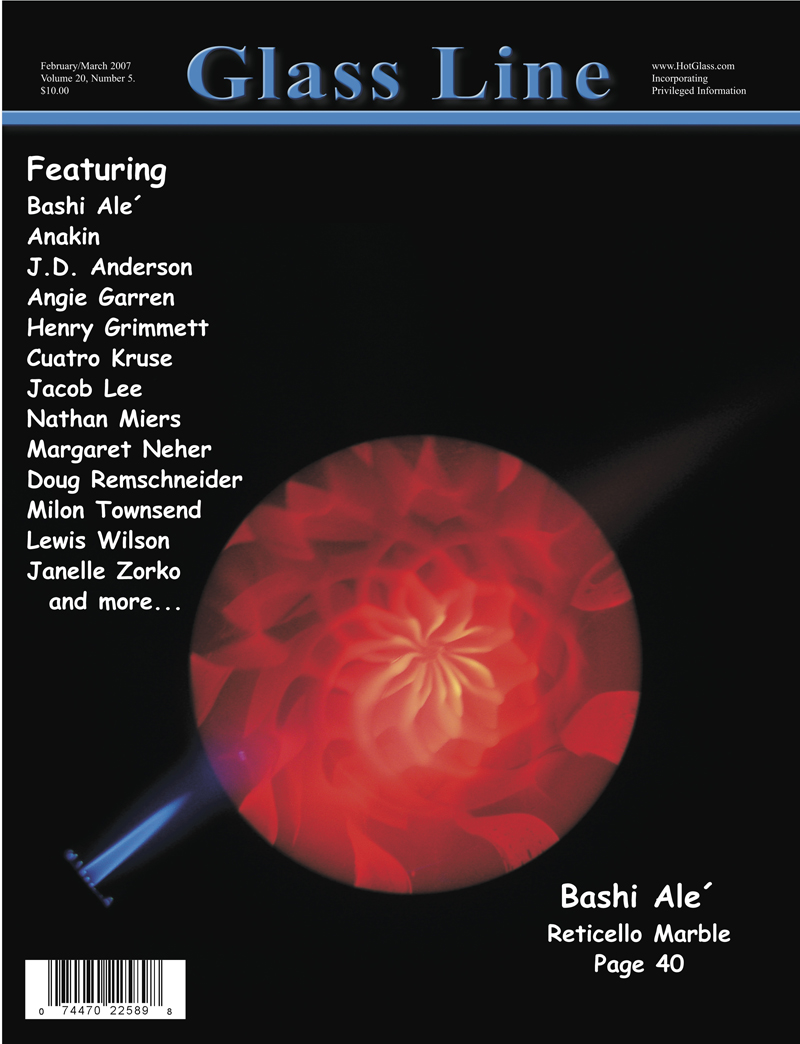
- Reticello Marble - by Bashi Ale' � Following are step by step instructions for making a silver fumed, double-sided reticello marble...
- Signature Murrini Cane Step by Step - by Nathan Miers of Eye Candy Arts � It�s a good idea to start out with the prep work so it�s all ready when needed. For this lesson, you will need to pull a few stringers of your favorite color(s). Put the 26mm rods on 10mm handles and pull a point from the 38mm tubing...
- Making Faces? At Your Age?? Of Course, You Can! - by Angie Garren � Your mother and teachers told you to quit making faces, but that was a long time ago. I say, make faces because you can and it�s fun. People like it when these faces �freeze that way.� Once you practice this basic face, you�ll be able to use these steps to makes heads and masks. Great news, too�you already know how to make dots, so you already have all the technical skill you�ll need to do this...
- Making a Schott Paperweight - by Lewis C. Wilson � This tutorial will show the making of a Schott glass paperweight. It will be heavy in tool use and long in dialog. There just is no way to shorten the many steps needed to produce this type of paperweight. If there are still questions remaining after reading this article, you may view the streaming video on my web site of a similar piece being made...
- Matrix Marble Step by Step: Evolution of a Good Idea - by Brad Brandolino (aka Anakin) � A little more than a year ago, when I began working with borosilicate, a marble I had seen online inspired me. I forget the maker of the marble. I remember that it was an implosion type marble, but the imploded design had straight edges�imagine a square or triangle shape extruded through a volume of clear glass. I wondered how this was done...
- 2007 IFC Conference Set for March 16-18 � Guided by the theme, �Thinking Beyond the Torch � Romancing Excellence,� Salem Community College will welcome Loren Stump and other noted artists to the 2007 International Flameworking Conference to be held at Carney�s Point, New Jersey, Friday-Sunday, March 16-18...
- Glassified Ads - February/March, 2007 - Vol. 20 No. 5.
- Workshop Calendar
(This issue will be available online after the printed copes are sold.) If you want your subscription to start with this issue, please tell us to start with (v20 n4)
<Click Here> To start your subscription.
In This Issue
- Wig-Wag Christmas Ornaments - by Lance McRorie � The following is a step-by-step article on how to make wig-wag reversal Christmas ornaments using bright cadmium colors ...
- Twisted Capsule Tutorial - by Paul N. Doty � In this tutorial, I will demonstrate how to make a twisted capsule pendant. This is one of my favorite pieces. There is an unlimited amount of ways you can make this. I make them different almost every time. Use your imagination ...
- Electroforming on Glass: Bubble Ring Bead - by Janelle Zorko � Electroforming* involves the use of a relatively simple set up�a beaker, electroforming solution, metal-loaded paint, anodes, copper wire, a set of leads and a power supply such as a digital rectifier.
In this series of articles, I will demonstrate several ways to add texture and interest to your glass work. These techniques ...- The Making of a Luminous Vessel - by Eric Ehlenberger � So, you work with glass, it�s beautiful, but to appreciate it best, you just have to illuminate it with light, right? Well, how about lighting it from within?
Give the glass illumination of its own! What�s involved ...- Jean Boutz: One of the Last Cross Fire Burners - by Beverly Decman � After the war, Boutz settled in Clermont, Florida, where he opened a glassblowing studio at Florida�s Citrus Tower. Boutz and his employees blew glass the old fashioned way�on cross fire burners�and sold the blown glass articles. Boutz traveled to France and Germany many times to purchase ...
- Flower Petal Beads - by Danny L. Sullivan � For this step-by-step, I will go into a few pre-bead setup steps just to provide info on my setup and settings. You can adjust the settings based on your type of equipment ...
- Apple Tree Pendant - by Bashi Ale' � Following is a step-by step on making a lampworked apple tree pendant ...
- Encasement and Depth: A Soft Glass Beadmaker�s Quest to Invent Illusion - by Starleen Ann Colon � Encasing and depth is what intrigues me the most as a glass artist. Achieving depth in lampwork beads is one of the most challenging facets of the art form. Let�s face it, there is only so much room in a half-inch round sphere to layer, poke, apply and encase all the ideas that constantly flood our creative souls! We all have one or two wonderful illusion tricks up our sleeve, but believe that it is just too much combining all within a single bead. I disagree! I do agree that it is tedious, time consuming and, at times, very frustrating to work at the torch developing systems of illusion. However, it is more rewarding to reap from the yield of hard work as each method is slowly incorporated into your glass art. It produces strong presence in your finished work. This is what I strive to accomplish with every torch session. My passion is to learn and combine many �techniques of illusion� within a single work of art ...
- David Willis - by Interview by Mark Lammi � I remember reading old issues of Glass Line�before I ever turned on a torch�and I was so intrigued by the interviews that were published periodically. It was incredible to me to read the perspective of these respected glass artists and I recall taking a lot from those interviews from artists like Robert Mickelsen, Milon Townsend, Roger Parramore, Suellen Fowler, Paul Stankard, Elsie Burton, etc., etc. Inspired by these, I recently was motivated to conduct a series of interviews of my own with various individuals who have served as an inspiration to my own career.
This conversation with David Willis marks the first of a series of five artist interviews I have conducted. It is my hope not only that some of these interviews will strike a cord with younger lampworkers�the way so many early Glass Line issues did for me ...- Self Discipline - by Josh Turner � Hagy begins with the basic preparatory methods of pulling points out of the assorted tubing sizes. He suggests the best way to estimate the length of tubing needed is a basic 2/1 ratio. This will leave you with enough glass to trim off any excess after expansion. Hagy really likes to make things as light and thin as possible while paying respect to concise wall gradient and form. While pulling points, ensure yourself that there will be more than enough when you�re finished so you can easily make another piece or make up for any mistakes or loss if needed. Allow the glass to gather slightly and then pull out approx 24� or more so ...
- Glassified Ads - December/January, 2006/07 - Vol. 20, No. 4.
- Workshop Calendar
Sold Out... please check venders. (Vinder-List)
When venders are sold out this will be online.
<Click Here> To start your subscription.
- Sculpting Moretti Glass � by Lance McRorie - This article is a guideline of techniques for sculpting Moretti glass. Techniques discussed will be assembly, flame chemistry, regions of the flame and how to enter heat ...
There are three methods of approach in the assembly of a complex Moretti piece ...- Implosion Vortex - by Raj Kommineni � In this how-to article, I will be demonstrating how to combine two different rod marble techniques to create one marble. The first technique is a rod implosion that is going to be incorporated into a vortex marble ...
- Eugene Glass School Flame-Off - by Mark Lammi � August 25 marked the beginning of the fourth annual Eugene Glass School flame-off competition in Eugene, Oregon. The three day event seems to be growing in size and popularity as both the attendance and participation this year marked an all-time high. The weekend began with torches blaring from lampworkers from across the country. The event featured five main categories (marble, wearables, lathe, sculpture/goblet and team sculpt/gob) ...
- Making More Realistic Reptiles Part II: Shaping Facial Features - by Josh Kennedy � As I stated in the last issue, there are several key factors to consider when sculpting reptiles. These include the eyes, the facial features and the positioning of the knees and elbows. In the previous issue, I demonstrated how to make and prepare a milli eye cane. This is, in my opinion, the first step to making more realistic reptiles. In this article, I will demonstrate simple techniques that I use to shape the facial features. The last factor to consider is the positioning of the knees and elbows ...
- The 6th Annual Art Glass Invitational - by Deborah Carlson � The Art Glass Invitational is a unique annual event held in late August, on the outskirts of the rural western Pennsylvania town of Hilliards. This distinctive event is hosted and is the brainchild of Tom and Elaine Doner, and is fast becoming the �Woodstock� for torchworkers. The only �rule� of the week is that you have to teach something and learn something. Much of the teaching and learning doesn�t come in the form of techniques on the torch, but rather lessons about life and friendships. The event is based on �Willy Wonka and the Chocolate Factory� and lives up to its name sake as being delightfully entertaining, very, very rewarding, packed with surprises and enjoyed by all who attend. Your invitation to attend comes in the form of a gold Wonka ticket. Your arrival at camp immediately transports you to another dimension and all your worries melt away. You are able to relax in the warmth and comfort of instant life-long friends who take time to sit around a campfire till ...
- Fuming a Checkerboard Marble - by Travis Weber � The technique I have decided to share is a fumed checkerboard. This design was one I developed some time ago for my bottle stoppers. I originally did it on a tube and you might find it easier to do that way. While working this design on a tube, you can apply it directly onto the unshaped straight tube. It is easier to maintain an even pattern this way because of the fact that the tube is straight and a solid marble is round. Also, it is easier to keep the nice hues from your metals.
By following the steps I have laid out here, you can skip some of the troubles I encountered along ...- Fluid Evolution - by Eliana Lopez � Glass for me became an extension of ceramics as it has for many glass blowers. I have a short attention span and love the outcome of pottery and clay, but grew impatient during the process. When I was introduced to glass, it was very intimidating. I was instantly intrigued by the roar and challenge of the furnace that held molten, honey-like glass, billowed heat at more than 2,000 degrees and could scorch the hair off my eyebrows and arms. At Alfred University, there was no just going in and signing up for beginning glassblowing. You had to manipulate your way ...
- Dichroic Galaxy Drawer Pull - by Matt McLamb � Drawer pulls are adaptable not only to cabinetry, but also sink and closet knobs. In this tutorial, I will show you how to make a dichroic galaxy drawer pull. The hardware to make these can be found online in kits as well as woodturning companies ...
- Fusing Lampworking and SCUBA Diving - by Judy Carlson � SCUBA diving and lampworking are two activities you rarely see in the same sentence. But I use my 11 years of SCUBA diving adventures as inspiration for my glass beads, and have developed a thriving business blending the two.
For the past 15 years, I�ve made my living as a make-up artist in Los Angeles. In my down time, I�ve pursued countless arts and crafts projects, from watercolors to faux furniture finishing to jewelry making. I have long been intrigued with glass art and glass beads. It wasn�t until I began researching lampwork beads on the internet, specifically the sculptural fish, that curiosity ...- Dichroic Mascot Pendants Practice and Presentation - by Bill McNerney � I have had the fortune of such mentors as Harold Cooney, Doug Remschneider and Kevin Ivey, who all talk about getting your hands on the torch every day. Practice, practice, practice is the mantra. Well, I don�t know about you, but I�ve found that practicing on the torch every day leads to a lot of �product� being made. So, what to do with all the �stuff� being made?
Now, I have a nice idea to deal with my �practice� in glass, which moves product and also can kick-start a reputation for product that people desire to purchase. After all, at some point bills need to be paid, even if you are an artist, hence: ...- Glassified Ads - October/November, 2006 - Vol. 20 No. 3.
- Workshop Calendar
Sold Out... please check venders. (Vinder-List)
When venders are sold out this will be online.
<Click Here> To start your subscription.
- A Whole New World: A Look at Applied Decoration - by Mark Lammi � Throughout my years behind the torch, I have come across many interesting and exciting applications in regards to applied decoration. I often think it is characteristic of lampworkers to focus and rely heavily on technique. While this can be both a good and bad thing, in many cases my work tends to be no exception. I currently enjoy executing various studies in technique and form because that style of work is appealing to me in many ways. However, I try not to let that approach become the sole focus of my creative endeavors. It is important to me as an artist to create work that is technically inimitable, undeniably thought provoking and encourages the viewer to experience myriad feelings, emotions and desires that can only be explained through the true beauty of artistic expression.
Recently, my work has been taking a whole new direction in the exploration of color, surface texture and form. I have come to realize that the possibilities in glass are literally endless. Through the use of mixed media and various cold working techniques, I am able to achieve affects that I never imagined possible. This is due largely in part ...- Two Glass Conferences - by Deborah Carlson � ”Summertime; conference time�” As defined by Julie Reimer and Tyler Rock, presidents of the Glass Art Association of Canada, in their opening statements of the Canadian Glass Conference, ”Conferences give us the opportunity to get together, to learn and have fun, but ultimately they are about creating community in order to develop something that is greater than what all of us can achieve individually.”
In May, I had the pleasure of attending the Canadian Glass Conference at Red Deer College in Red Deer, Alberta, Canada. During June, I ventured to St. Louis, Missouri, USA, for the Glass Art Society�s annual conference. Both conferences encompassed the same basic philosophy, but each one was a different experience, a different energy. Had I not experienced both within such a short time span, I doubt I would have noticed this difference as much as I did. Both conferences were constructed for the attendees and both well attended, taking into consideration the population of the memberships in each respective club. For the GAS conference, because of the size of its membership, a large venue was needed. There would be more than 1,000 glass fanatics attending, which meant big energy to keep all those members happy. Since the Canadian conference only dealt with 180 attending members, the energy level could be kept more diminutive, venue smaller, with the learning more inward than outward. Both types of conferences are needed to develop a whole self. We, who love fire and light, are, after all, just one creature, desiring the inner knowledge about our universe ...- Kiln Formed Roll-ups - by Claudia Whitten � These lampworked pieces had to be fired into the top of the glass and then flipped down in the final assembly of the piece. The lampworked pieces had a look to them I could not get with a fusing technique. When fired into the glass, the round pieces spread and have a great free energy to them. One of the lampworked pieces that were stretched very thin was black; being a soft glass, it bled into the surrounding color. The thin line was important to the design, not having such a thin line before I did not expect this. It did not happen on the fusing of the piece but from the heat of the glory hole. Bullseye now makes a stiff black that I have been working with. I plan to do some tests to see if it will hold its shape better. I would like to learn more lampworking skills to bring into my kiln work when the need arises...
- The Strength of Bead Making - by Kenan Tiemeyer � At first, my inside out beads were simply filled with miscellaneous colors, dots and squiggles. It was all about filling the space with colors and patterns. The patterns were thick and undefined. The colors were random and the colors that contained metals were uncontrolled. As time went on, I focused on my color selection. I gradually began to use more colors with striking and luster properties to create multiple hues and auras within color patterns. I tried to add three-dimensional elements with clear-fumed dots and deeply encased squiggles. As I progressed as a lamp worker, I began blowing my inside out cups thinner and thinner. I pulled thinner stringers for decorating the inside of the cup. Instead of decorating the blank, closing it, and forming a thin wall bead, I began condensing it to create very thick, more pronounced 3-D patterns. I also began to focus more ...
- Wheaton Village Marble Weekend - by Nathan Miers � I packed my clothes and loaded my iPod with glass videos for the plane ride and headed for the Portland Airport. I don�t fly to many glass events because of the rising travel costs, but I kept hearing how Wheaton would be worth it, even if I didn�t make many sales. I shipped my glass and display items a week before the show to a nearby relative to assure they would arrive on time and in good shape�I�ve never had much luck with airport baggage handlers and glass.
When I arrived on Friday afternoon, I had some extra time to check out the Wheaton Village grounds. I was extremely hungry after all the traveling so I went to the Paperwaiter Restaurant. What�s cool about the restaurant is that each table has a paperweight permanently attached to the table. This makes it hard to admire, but it�s humorous to watch people sit down and grab the paperweight a few times until they realize ...- Incorporating Sculptural Forms - by Cuatro Kruse � With that said, I would like to show you one of the ways you can incorporate any sculpture into a vessel as a decorative stopper. There are many ways to display a sculptural piece. You can incorporate sculpture into a goblet or footed vessel as a stem, or display it in a mixed media piece. You can simply put it on a base or flared foot, or make it stand all by itself. The possibilities are endless. I will simply show you one of my favorite methods.
I begin by pulling some small, double-handled points from 9.5-mm tubing or smaller, and preparing some powdered frit in a frit tray. When using powdered frit, you must be very careful not to ...- Encasing and Tinting Foils in Lampworked Glass Fish Beads, Part II - by Debbie Crowley � Another consideration is the temperature of the glass when preparing to case the foil. If the gather on the rod is close, or at white hot, it will add a yellowish/gold color to the foil in that spot. Sometimes this is desirable, as in the case of the Butterfly Koi fish photo. The silver foil was cased with alternating super hot dabs of clear and dabs that were allowed to cool one second only before applying. It is amazing how temperature will affect the foil. Using this to your advantage can add some watercolor type blending of yellow into any other casing color. Some types of soft glass clears add more gold than others.
Lastly, any striking color can bring streaky or completely different color combinations. Apply different thickness of ...- Making More Realistic Reptiles - by Josh Kennedy � In this article I will demonstrate how to make a milli eye cane that is simple, yet effective. In my opinion, this is the best technique to use when making detailed eyes. I will use a very basic pattern to make the concept easier to grasp. Keep in mind that with all projects, colors and shapes can be changed or modified to suit the task at hand ...
- Bone Demonstration - by Sky McDonagh � Due to political unrest in the Middle East and at home, degradation of trust with respect to our government and apparent disregard for human life (on both sides), I began an installation project called ”Bones.” It is to be comprised of 206 bone-shaped beads, which is the exact number of bones in the human body. Each bead is to be made from dark ivory soft glass, fumed with silver and detailed with tally marks applied with intense black stringer. The tally marks hatched across the center serve as a visual reminder of each person�s significance. The bones are each a different size and each is unique. Making them, I am able to reflect on the importance of human life and the lives lost; no matter what race, religion or ethnicity.
This demonstration is simply a guide to creating a bone bead ...- Chasing Down Your Muse - by Amber Van Meter � It has happened to all of us at one time or another.
You sit down at the torch; ready to design a masterpiece and as you start, you find something is missing. There�s an intangible piece of the puzzle that just isn�t coming together. ...- Frying Pan Marble - by Bruce Breslow and Allison Cermak � A combination of equipment and materials are used to make the Frying Pan Marble. Some are purchased from glass supply houses; others are ”found object tools” and homemade equipment. Of the purchased materials, I use soft glass with a COE of 104, Lauscha glass from Germany, Moretti (also known as Effetre) from Italy, Vetrofond from Italy and Czech glass from the Czech Republic. I use a Lynx torch purchased from Glass Technologies and operate it on a combination of propane and oxygen. My molds are the Infinite Rim mold designed by Drew Fritts and produced by Dan Grumbling, the 5-in-1-sphere mold from Glass Craft and cherry wood molds. Walter Evans at the Cherrywood Mold Shop makes some of the cherry wood molds and some are homemade at the ...
- Glassified Ads - June/July, 2006 - Vol. 20 No. 1.
- Workshop Calendar
Sold Out... please check venders. (Vinder-List)
When venders are sold out this will be online.
<Click Here> To start your subscription.
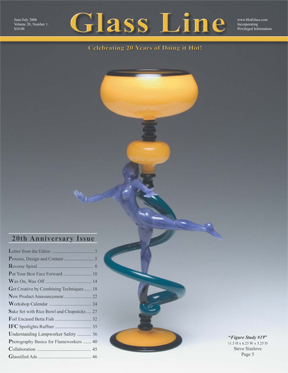
- Letter from the Editor: As Glass Line celebrates its 20th year, I want to thank each of you�glassworkers, collectors, manufacturers, advertisers and supporters�for your longtime interest and support of Glass Line and its mission to share information and connect lampworkers in the world of glass...
- Process, Design and Content - by Steve Sizelove. - For many glassworkers, especially those new to the medium, it’s easy to get caught up in technique. I’ll be the first to admit that I’ve spent countless hours reverse engineering functional pieces. I've heard it said more than once, "Technique is cheap." While I completely...
- Reverse Spiral - by Richard Clement - There are a couple of ways�to create�a reverse spiral affect on tubing. The photos with this article show a perfume bottle, but the technique can be adapted to many other things. This bottle is made out of one piece of tubing...
- Put Your Best Face Forward: Mask Beads - by Janet Crosby - For me, mask beads are �end of day� beads�a chance to use that extra stringer, try new shapes, designs and color combinations. This tutorial will show you the basic face design. There are no right or wrong ways to do these beads. They are �masks� and for me, merely suggestions of faces...
- Wax On, Wax Off: Some Positive Thoughts on Repetition - by Kevin Ivey - Each flower ring is hand sculpted using the implosion technique to create a sense of depth, as if each flower is in mid-bloom....
- Get Creative by Combining Techniques - by Jesse-DeMoss - I am isolated from other glass workers in the beautiful mountains of central Idaho. Without the access that many people have to workshops, schools and shop mates, learning and mastering new techniques is a challenge. This is why it is essential for me to rely on my creativity to try new and interesting ways of working with glass.
All of us have the skills to discover something completely new. I hope this article will show you a great step-by-step, but more importantly...- Sake Set with Rice Bowl and Chopsticks - by Mark Lammi - For this issue, I wanted to do a step by step article on something I recently found to be an extremely fun and rewarding product as well as a popular one in the marketplace. With any product, there is a lot of room for debate on whether or not it sells well, but I think you will find with a little research that sake sets, sushi sets and other ”eastern inspired” themes are extremely popular. If nothing else, I enjoy making them and that�s normally enough reason for me. With any product, it has to do with finding ...
- Foil Encased Betta Fish Part I - by Debbie Crowley - This is a step-by-step lampwork demonstration of a foil encased Betta fish. For this fish I will be using Uroboros Glass rods. Make sure you have a kiln hot and all needed supplies at the ready before you start, it will take approximately 40 minutes...
- IFC Spotlights Ruffner - More than 450 attended the 2006 International Flameworking Conference with guests from 27 states and Germany. Held March 17-19 at Salem Community College in Carneys Point, New Jersey, the featured artist of the conference was Ginny Ruffner of Seattle, a flameworking pioneer who presented a fascinating overview of her career titled, ”Creativity and Other Stuff.” Other conference features...
- Understanding Lampworker Safety - by Henry Grimmett, Technologist at Glass Alchemy, Ltd. - Lampworking has come far in the last 20 years, in large part due to the work of Jim Thingwold and his Glass Line magazine and HotGlass forums. Due to his pioneering work and dedication, a lot of information has exchanged hands. I started reading Glass Line back in 1995 and I joined the forum in 1996. I still have some printouts from those days on safety topics and how-to�s. During the ensuing time period, new tools, torches and colors have come to market. Thousands have adopted glass as an art...
- Photography Basics for Flameworkers - by Robert Mickelsen - What happens when you make a really good piece and then sell it? What do you have after you spend the money? How do you tell the world about this beautiful piece you made that is now in the home of a collector who only shows it to family and friends? How can you generate new interest in your work among clients without them being able to see that piece? The answer, of course, is photographs! And the obvious point here is that they had better be good ones...
- Collaboration - by Josh Sable and John Kobuki - Josh Sable and I have done a few collaborations in the past couple of years. These are some of the latest marbles of 2006. It�s a challenge to combine two styles into one finite shape. The most popular marble we put together combines two separate halves ...
- Glassified Ads - June/July, 2006 - Vol. 20 No. 1.
- Workshop Calendar
Back Issues
HOME
BACK ISSUES
ONLINE EDITION
SUBSCRIBE
USER CENTER
CONTACT US
PRIVACY POLICY
CONTACT US
Copyright © 1995-2020 GLASS LINE. All Rights Reserved.
All trademarks mentioned herein belong to their respective owners.Last Modified: 09 AM on Tuesday - March 19, 2019